API Data Flows
Tangram Pro™ Data Flows allow you to visualize, understand, and validate models of API integrations.
Manage API Resources
API Resources are user-uploaded OpenAPI Specification (OAS) files that describe endpoints and schemas. They are the source of endpoints associated with Data Flows.
User and Team Resources
API Resources for your user account and teams are managed separately. This allows you to segment access to API specs by Team. Within Team Projects, only the resources associated with that team are accessible. Within Personal Projects, only your user account resources are accessible.
For Personal Projects:
- Go to User Settings by clicking on your profile image on the top right
- Select API Resources
For Team Projects:
- Go to Teams on the top navigation bar
- Select the team you want to manage
- Select API Resources
Add New Resource
- Click Add API Resource and select a YAML file to upload
- Tangram Pro will validate the YAML file to ensure it conforms to the OpenAPI spec.
- If it contains errors, they'll be listed in detail and prevent the upload.
Uploaded API Resources get metadata from the OpenAPI YAML info object, specifically title, description and version.
info:
  title: Database API
  description: Example server for a database.
  version: 1.0.1
Add New Version
Each API Resource you've added can be updated by uploading a new version. You'll be shown a diff of added and removed Endpoints.
- Go to API Resources and open the API Resource you want to update
- Click Upload API Schema
- Choose your YAML file
- Click Overwrite Existing Version
Explore API Endpoints
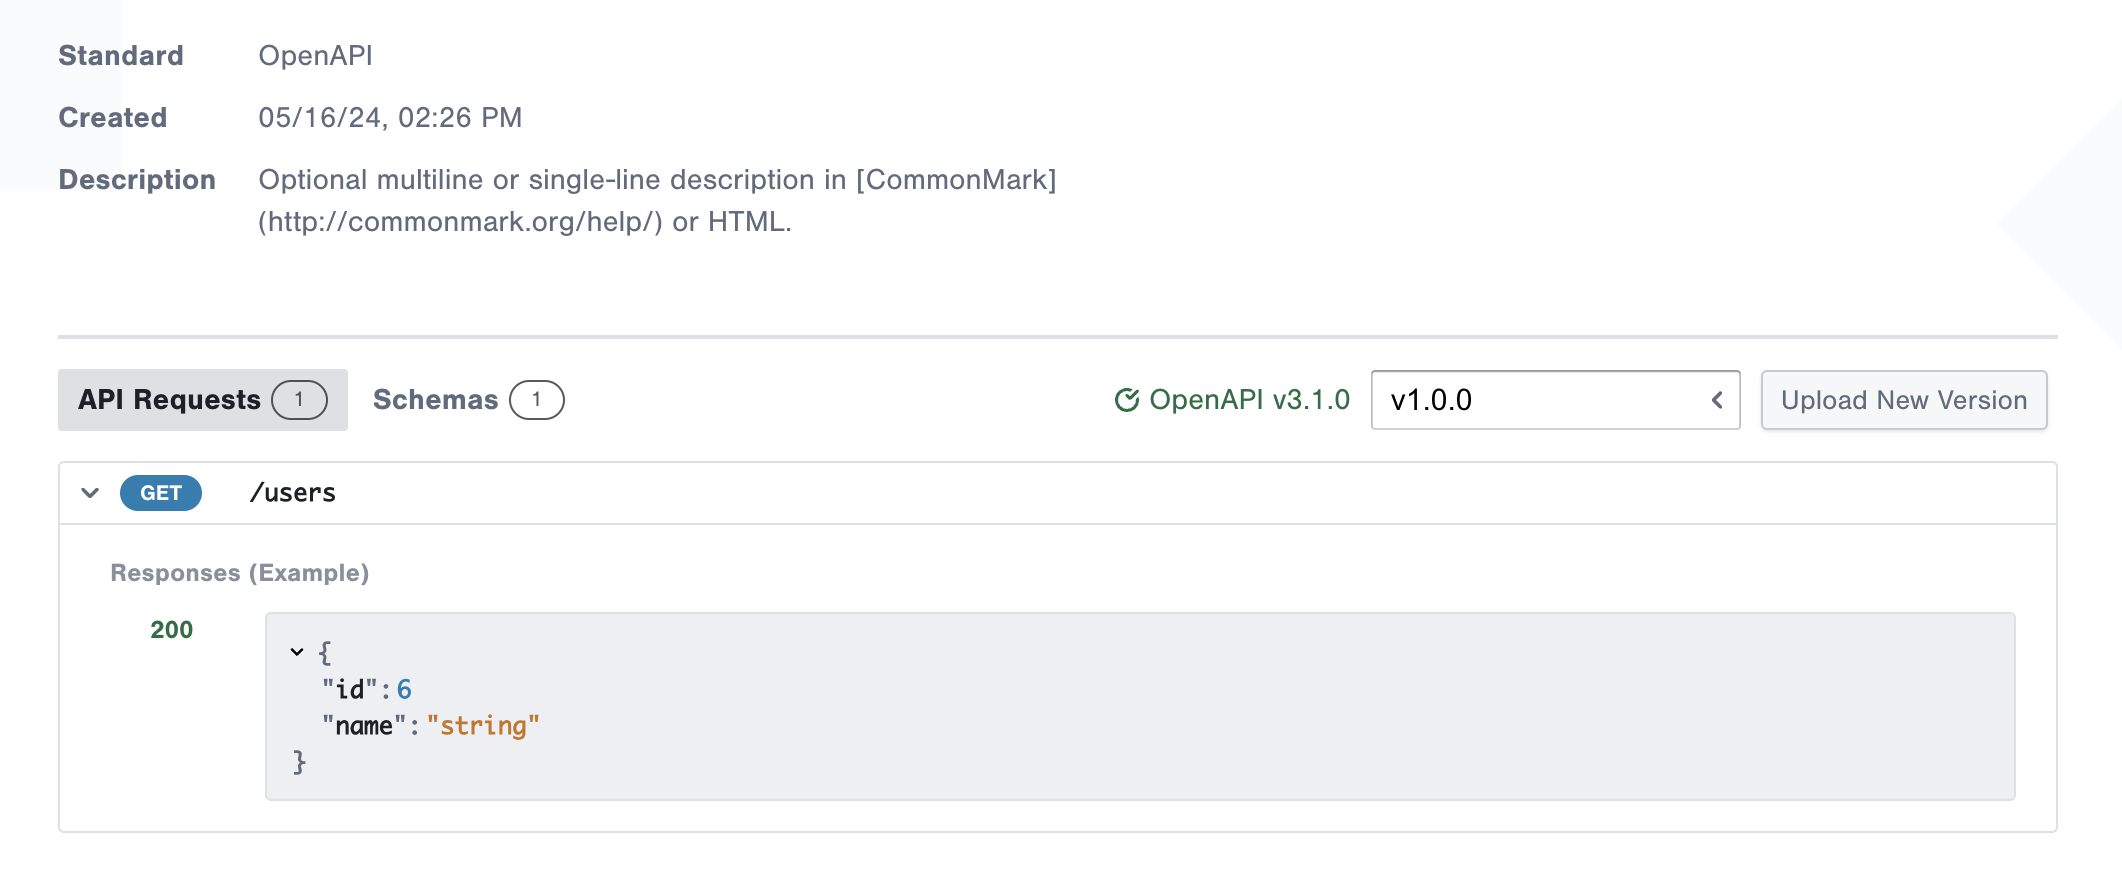
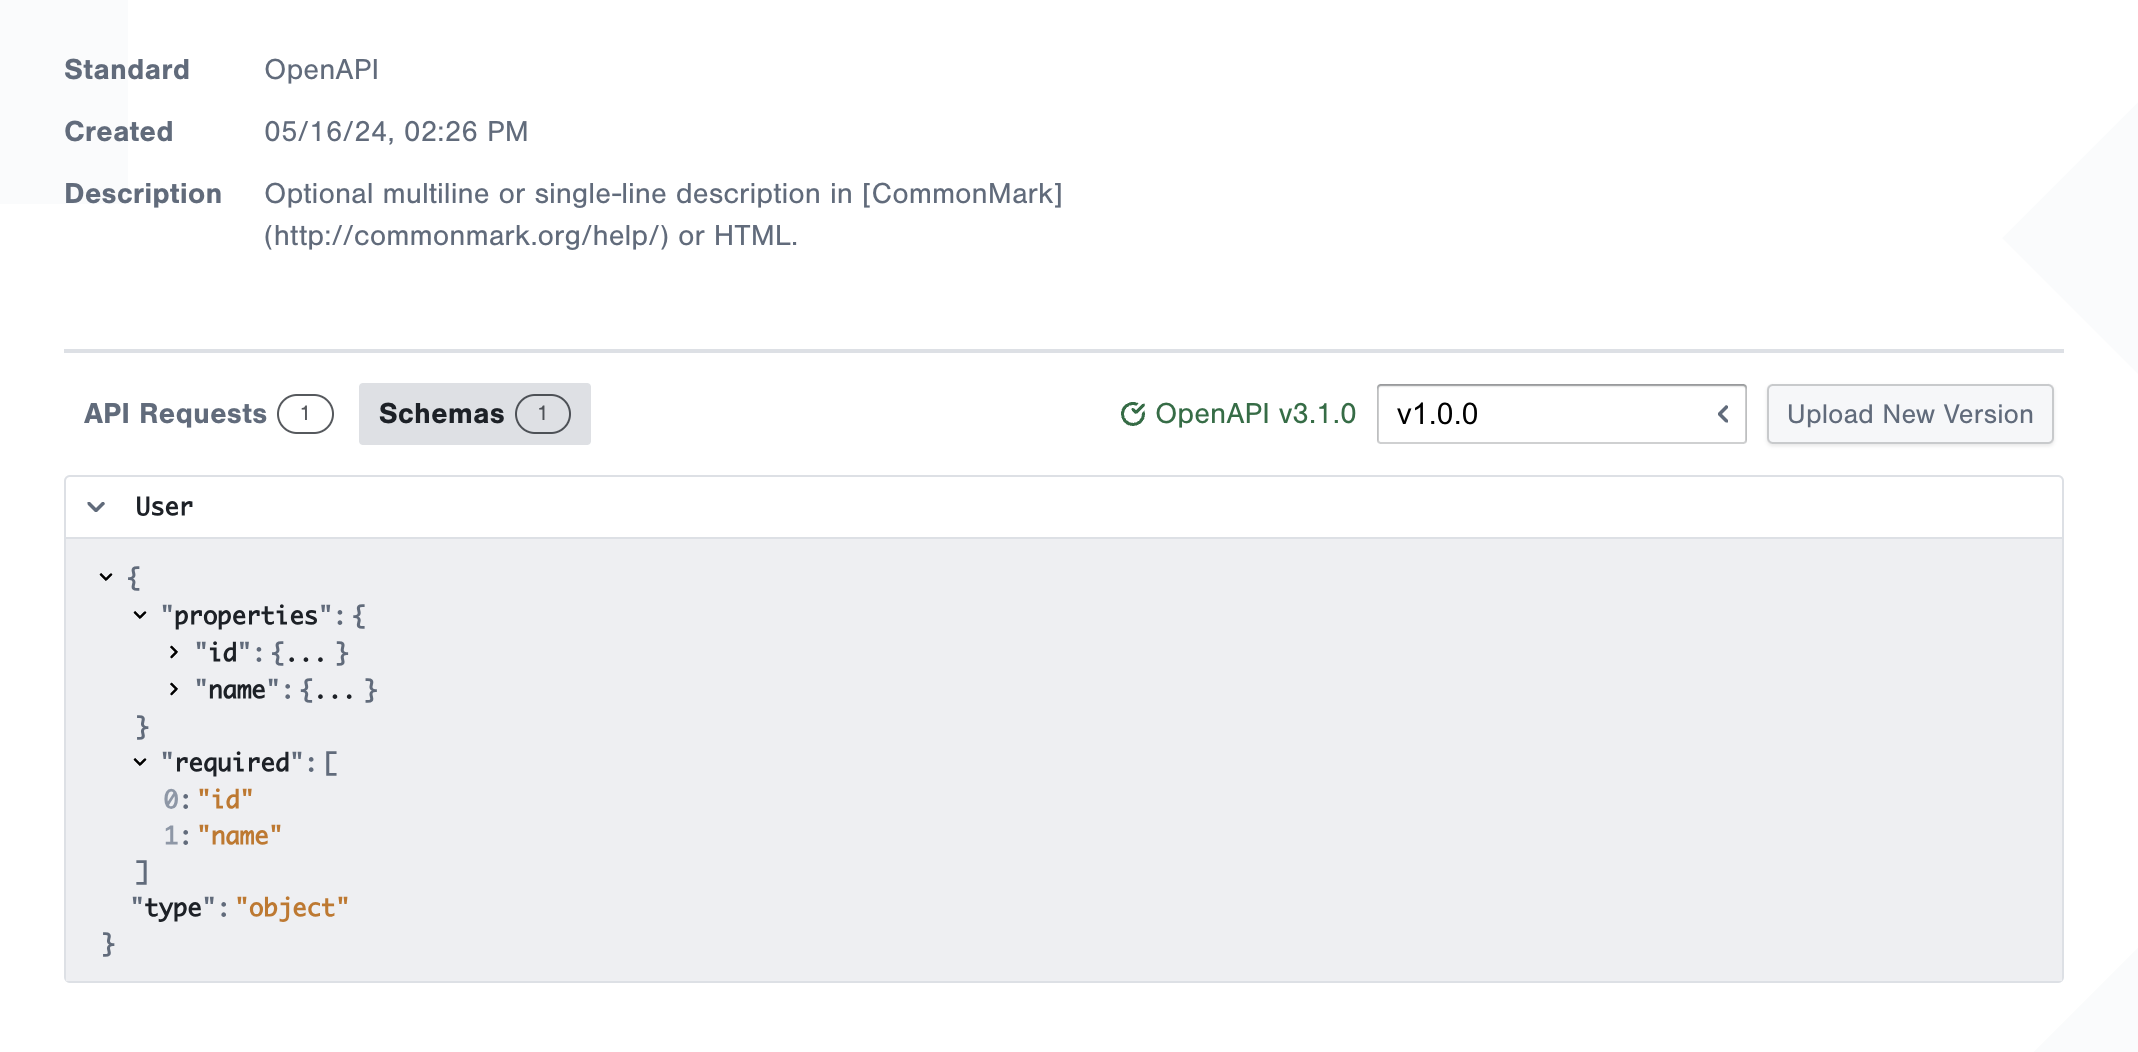
Tangram Pro allows you to inspect details for each API Endpoint and Schema.
- The items in the paths object are listed under API Endpoints
- The items in the schema object are listed under Schemas
Click for example YAML
openapi: 3.0.0
info:
  title: Example API
  description: An example OAS file
  version: 0.1.10
servers:
  - url: http://api.example.com/v1
    description: Optional server description, e.g. Main (production) server
  - url: http://staging-api.example.com
    description: Optional server description, e.g. Internal staging server for testing
paths:
  /users:
    get:
      summary: Returns a list of users.
      description: Optional extended description in CommonMark or HTML.
      responses:
        '200':    # status code
          description: A JSON array of user names
          content:
            application/json:
              schema:
                $ref: '#/components/schemas/User'
components:
  schemas:
    User:
      type: object
      properties:
        id:
          type: integer
          example: 4
        name:
          type: string
          example: Arthur Dent
      required:
        - id
        - name

Data Flows
A Data Flow is a series of API requests ("Steps") between components in a system. Each Data Flow Step contains an editable text Annotation and optional API Endpoint.
If you've already added an API Resource, associate it with all components that represent the target or server for API requests.
For example,
- Open a project
- Add 2 components. You can think of one as a client and the other as a server.
- Edit the server component by clicking its ... button, and select API.
- Click Add and choose the desired API Resource
Now all of the API Resource's endpoints are associated with the component.
Add Data Flows
You can create multiple Data Flows as needed. Each Data Flow contains a linear series of steps between components, which you can visually walkthrough.
- Click the + button in the Data Flows section on the left
- Enter a name and create
- Add Data Flow Steps by either drawing a line between two components or clicking the + button in the panel on the right
- Enter an Annotation and select an API Endpoint. Steps can be created with no endpoint and updated later.
Walkthrough
You can walkthrough the Data Flow Steps by clicking the Walkthrough button.
Filter View
You can view a particular Data Flow by itself by clicking the eye icon next to it.