Multi-Transport Integration
In this tutorial you'll learn how to:
- Design a Multi-Transport System
- Integrate different Message Types with a Transform
- Generate compiled Interfaces, Transform Code and Transport Libraries
- Create Containers and run an End-to-End Transform Test inside them, all within Tangram Pro!
Scenario
You've just started as an Integration Engineer at SkyShield, a small startup in the electronic warfare space serving the Air Force. Your team at SkyShield is working with RadarWarfare Solutions (the "prime") on a follow-on project to demonstrate their platform integrating with SateSphere's platform.
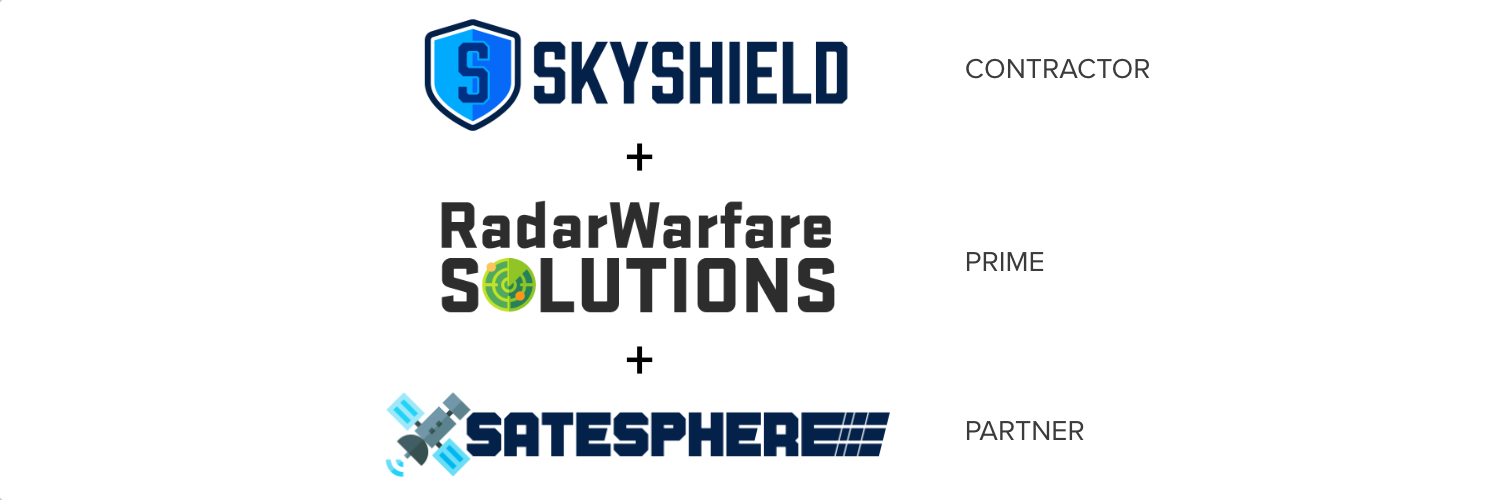
The companies represented here are for illustrative purposes and are not real
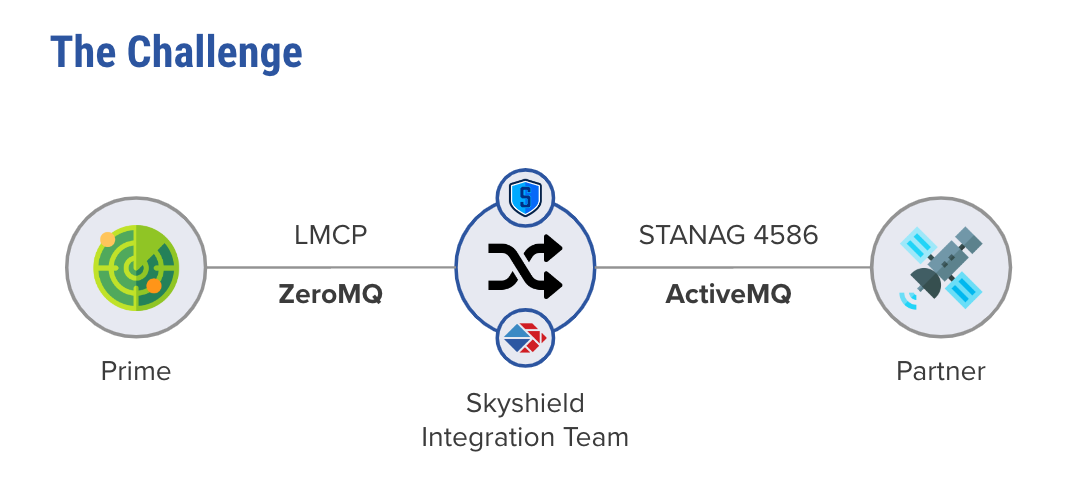
RadarWarfare's systems communicate using the ZeroMQ messaging library and the OpenUxAS LMCP message standard, while SateSphere's systems communicate over ActiveMQ and use the NATO STANAG4586 message standard.
Your team is evaluating the effectiveness of an integration tool like Tangram Pro to help them integrate and test their systems. Your team has defined a Flex Transform in Tangram Pro to convert the LMCP AirVehicleState message type to the STANAG4586 InertialStates message type. Now you're ready to build and test the Transform inside Tangram Pro in a Multiple Transport scenario.
Design the System
1. Create a Project
To begin modeling a system we need to make a project. Projects are used to design component-based systems, generate and run code based on your design. Let's get started!
- Go to Projects and click New Project
- Enter a Project Name
- You can associate a team to your project with the Select Owner dropdown menu, or keep Personal (You) selected
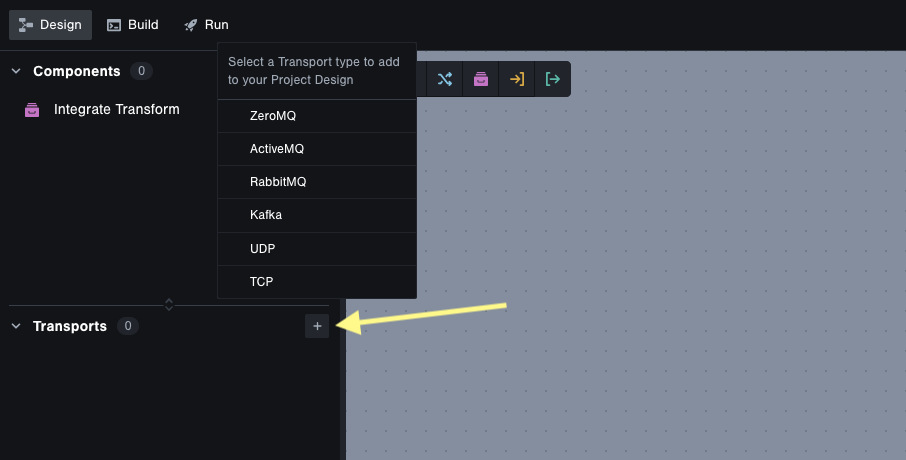
2. Add Transports
The model of our integration scenario requires two different messaging libraries, or what we call Transports. This is easy to design in Tangram Pro. Let's start by adding ZeroMQ and ActiveMQ.
- In the left sidebar, click the + button in the Transports section and add ZeroMQ
- Repeat and add ActiveMQ
All the Transports in your design are listed in the Navigator on the left. We'll make use of these when we start connecting components. The one with the asterisk (*) designates the default transport. For more information see User Guide: Design > Transports
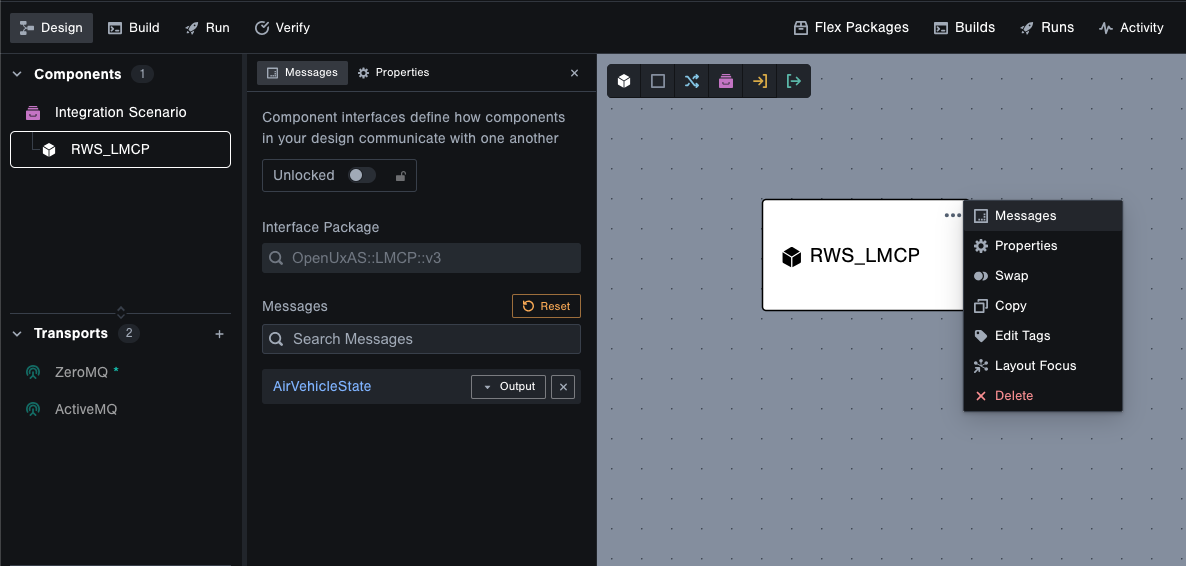
3. Add Components
Add a Component to represent a RadarWarfare Solutions software component that sends the AirVehicleState LMCP message type
- Click the Add Component button in the design toolbar, then click anywhere in the stage
- Double-click its name and change it to
RWS_LMCP - Click the ... icon in the component and choose Messages
- Choose the following interface options:
- Package:
OpenUxAS::LMCP::v3 - Message:
AirVehicleStateand selectOutput
- Package:
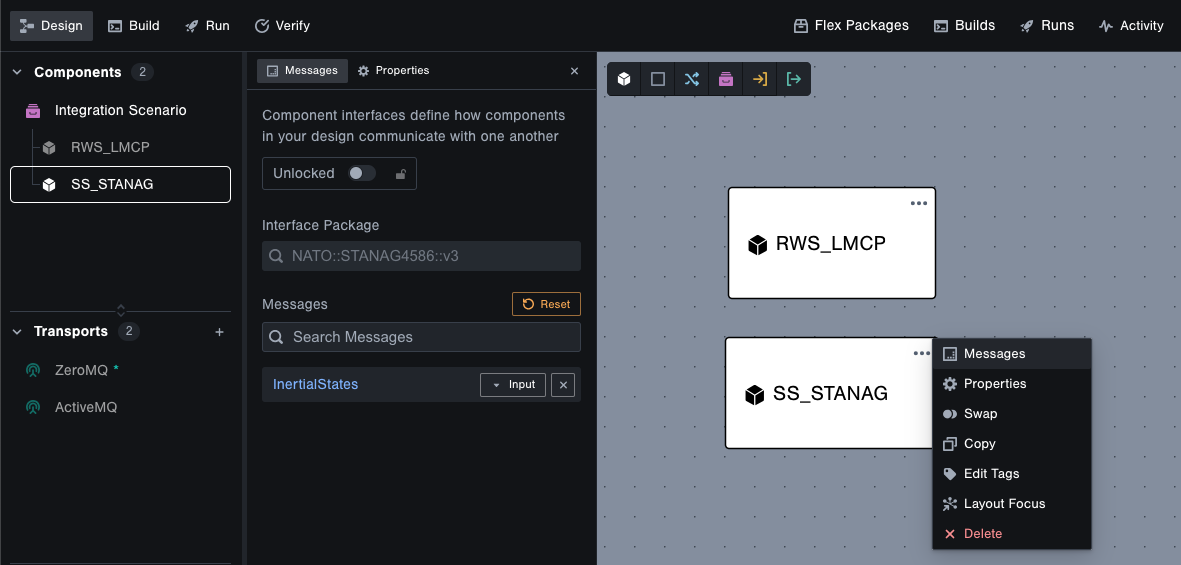
Add a Component to represent a SateSphere software component that receives the InertialStates STANAG4586 message type
- Add another component and name it
SS_STANAG - Click the ... icon in the component and choose Messages
- Choose the following interface options:
- Package:
NATO::STANAG4586::v3 - Message:
InertialStatesand selectInput
- Package:
4. Add a Transform
A Transform allows you to integrate different message types in Tangram Pro, and not just visually in the design. With the click of a button, Tangram Pro will generate an executable Transform application based on your model with safeguarded input and output interfaces (e.g. the message types allowed, serializer/deserializer needed and transport to use).
For this integration scenario, you'll use a Transform to relate the LMCP AirVehicleState and STANAG4586 InertialStates message types. Both of these messages contain information about the position and velocity of an aircraft and are used for similar tasks, but they are structured differently and comprised of data types that are specific to the LMCP and STANAG4586 format standards.
Tangram Pro uses FlexLang, a specification language, to describe Transforms. Flex enables accurate and readable transform specifications that can be transpiled into a variety of languages and output formats. We're going to use an existing AirVehicleState to InertialStates Transform for this tutorial, but you can always author your own.
- Click the Add Transform button in the design toolbar and click anywhere on the stage to add it
- Now select which components connect to the transform. Click on
RWS_LMCPfirst, thenSS_STANAG - For the Input Message, use the Suggested button to choose
AirVehicleState - For the Output Message, use the Suggested button to choose
InertialStates - Apply the
AVS2ISTransform - Next we'll specify the transport and serializer for both sides of the transform application that we'll generate in the next section
- For the Input Message choose:
- Transport:
ZeroMQ - Serializer:
LMCP
- Transport:
- For the Output Message choose:
- Transport:
ActiveMQ - Serializer:
STANAG4586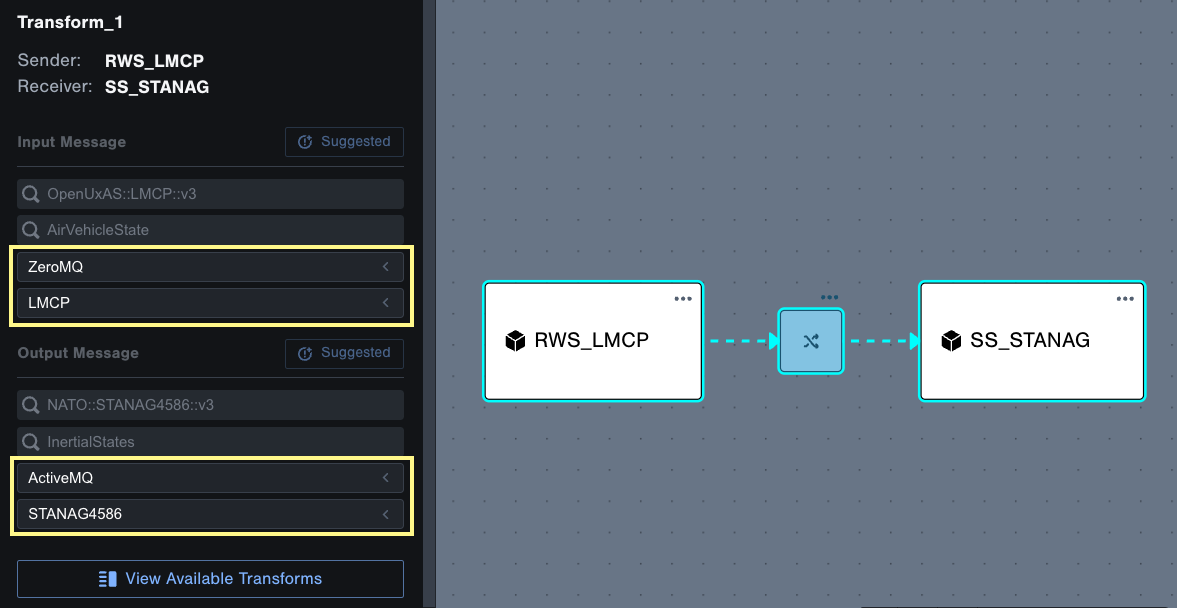
- Transport:
- Close the transform settings by clicking in any empty area in the design
Now that your Transform is added, try hovering over each Transport listed in the Navigator. The connections that are using the Transport will be highlighted in the design.
Configure Build
Nice work! You've just created a model of the integration scenario. From this model, Tangram Pro can generate code, compile and place it in containers to test. Your Project Design acts as the source of truth for your system interfaces (you've just specified all of the interface details as you created the model) so generating code is easy and repeatable.
In this section, you'll configure Tangram Pro to:
- Generate LMCP Interface Code, which will serialize & send AirVehicleState messages to ZeroMQ
- Generate STANAG4586 Interface Code, which will deserialize & receive InertialStates messages from ActiveMQ
- Generate a Transform application, which will deserialize incoming AirVehicleState messages from ZeroMQ, transform the data, and serialize & send the resulting InertialStates messages to ActiveMQ
- Containerize the entire system. All Tangram Pro needs is a Dockerfile, and it will create a container image and push that image to the Tangram Pro container registry. You can run these containers to test your system.
You're also going to utilize end-to-end tests that are generated along side the interfaces and transform code.
5. LMCP Build Actions
First you'll configure the Build Actions for the LMCP Component. You're going to generate C++ Interface Code for LMCP, and use a Dockerfile to run that code in a container image. There's a test app that's generated with the interface code named Writer, which will create and send AirVehicleState messages. In the Dockerfile provided below you'll see that we set the Transport to zeromq, move into test/end-to-end and run ./afrl_cmasi_AirVehicleStateWriter in its container.
- Click Build in the top left menu
- Select the
RWS_LMCPComponent - Go to the Actions tab and enable:
- Generate Interface Code: C++
- Compile Code: all
- Containerize
- Include Generated Code
- Use Local Dockerfile
- Copy the code provided below
- Click on Edit Dockerfile and paste the code
- Click Close Dockerfile
Click to view Dockerfile code
FROM tangramflex/pro-builder:latest AS build

ARG package=lmcp
ARG transport=zeromq
ARG transport_hostname=zeromq-transport
ARG binary=afrl_cmasi_AirVehicleStateWriter

ENV transport_hostname=${transport_hostname}
ENV package=${package}
ENV binary=${binary}

COPY code-gen/local_install /working/local_install
COPY code-gen/pkg_deps /working/pkg_deps
COPY code-gen/test /working/test
COPY code-gen/include /working/include
COPY code-gen/build /working/build
RUN sed -i "s/127.0.0.1/${transport_hostname}/g" /working/pkg_deps/genericapi/pkg_deps/transports-cpp/transports.config
RUN cd /working/test/end-to-end && make -j4 serializer=${package}

ENV LD_LIBRARY_PATH=/working/local_install/lib:/working/build/libs
WORKDIR /working/test/end-to-end
CMD [ "sh", "-c", "sleep 60 && ./${binary}" ]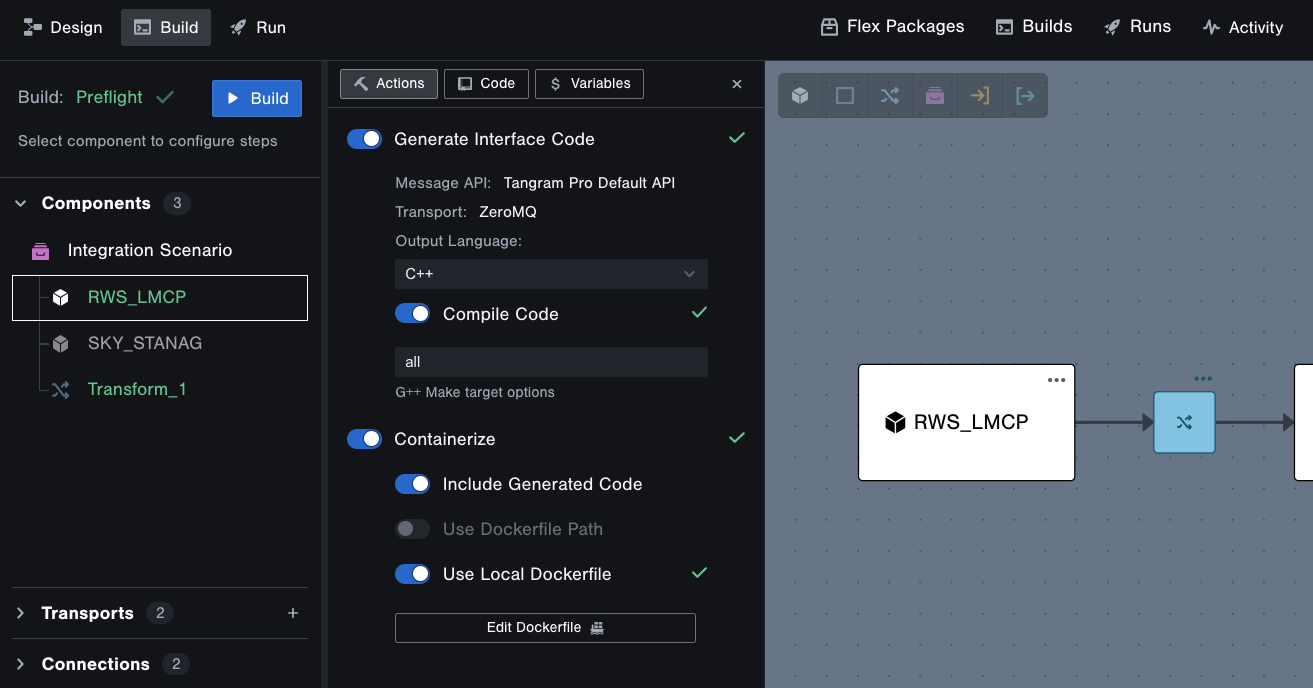
6. STANAG Build Actions
Next, you're going to generate C++ Interface Code for STANAG4586 and use a Dockerfile to run that code in a container image. There's a test app named Reader that generated with the interface code, which will listen for incoming IntertialState messages . In the Dockerfile provided below you'll see that we set the Transport to activemq, move into test/end-to-end and run ./Reader in its container.
This configuration will be the same as the previous component, except for the Dockerfile.
- Select the
SS_STANAGComponent - Go to the Actions tab and enable:
- Generate Interface Code: C++
- Compile Code: all
- Containerize
- Include Generated Code
- Use Local Dockerfile
- Copy the code provided below
- Click on Edit Dockerfile and paste the code
- Click Close Dockerfile
Click to view Dockerfile code
FROM tangramflex/pro-builder:latest AS build

ARG package=stanag4586
ARG transport=activemq
ARG transport_hostname=activemq-transport
ARG binary=Reader

ENV transport_hostname=${transport_hostname}
ENV package=${package}
ENV binary=${binary}

COPY code-gen/local_install /working/local_install
COPY code-gen/pkg_deps /working/pkg_deps
COPY code-gen/test /working/test
COPY code-gen/include /working/include
COPY code-gen/build /working/build
RUN sed -i "s/127.0.0.1/${transport_hostname}/g" /working/pkg_deps/genericapi/pkg_deps/transports-cpp/transports.config
RUN cd /working/test/end-to-end && make -j4 serializer=${package}

ENV LD_LIBRARY_PATH=/working/local_install/lib:/working/build/libs
WORKDIR /working/test/end-to-end
CMD [ "sh", "-c", "sleep 3 && ./${binary}" ]
7. Transform Build Actions
Lastly, you're going to generate and compile a Transform application, and run it in a container. There's an end-to-end test generated with the transform code that you'll be using to test the translation of AirVehicleState data into InertialStates data. Running the end-to-end test will also make sure the Transform app can connect to a ZeroMQ messaging service and an ActiveMQ messaging service simultaneously.
-
Select the Transform
-
Go to the Actions tab
-
Choose the option Generate Transform with CSIs
-
Choose the Adapters
- Input:
OpenUxAS LMCP v3 - Output:
NATO STANAG4586 v3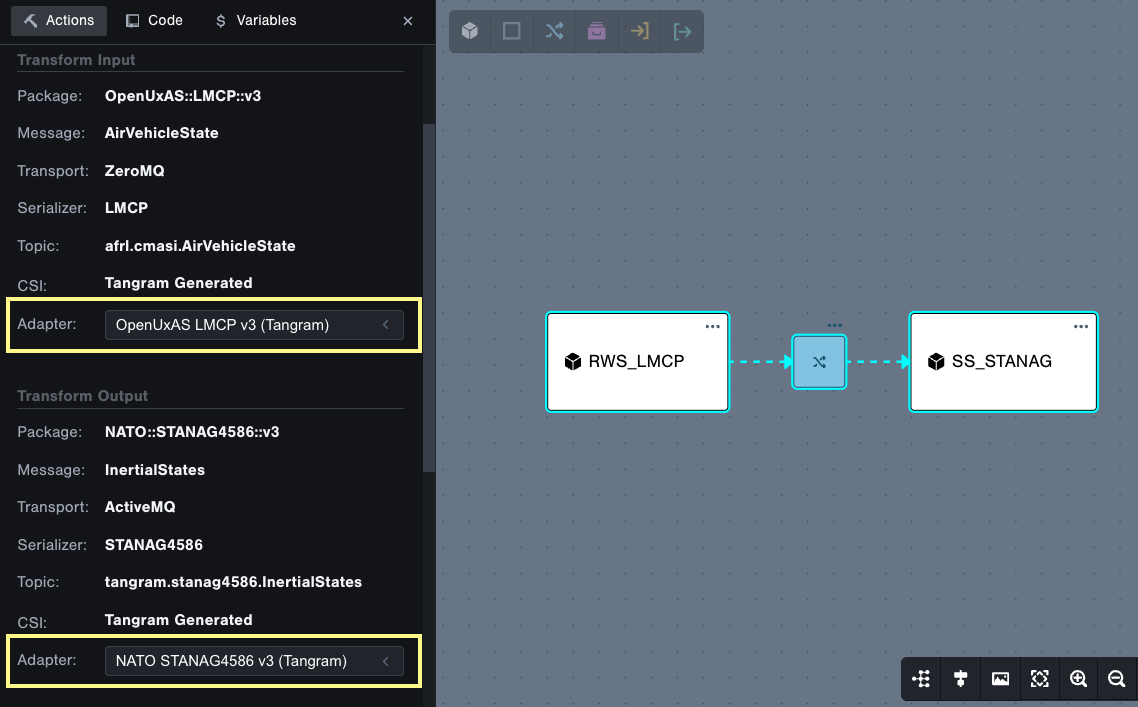
- Input:
-
Enable Containerize
-
Click on Edit Dockerfile and click the "default" symbol in the rop right
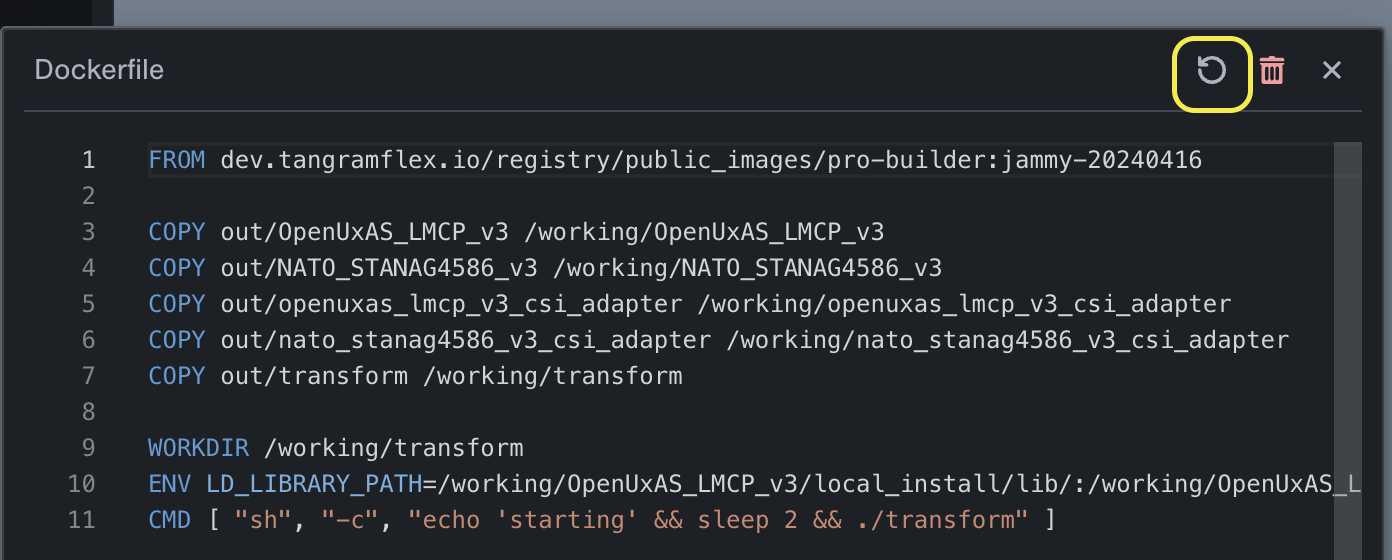
-
Click Close Dockerfile
To make sure your transform is set up correctly, check if you see ZeroMQ for the Input Transport, and ActiveMQ for the Output Transport. If they are different, click the Design button in the top left to update the transform's transports, then return to Build.
Run End-to-End Test
Great! Now you're all set and ready to generate code and test it out. In this section you'll:
- Complete a Build, which generates code and containers for the entire system
- Run an End-to-End Test in Containers, which will verify that the generated interfaces and transform are integrated
8. Generate Code
- Click the blue Build button
- Grab a cup of coffee ☕ and check out the streaming build logs. This may take up to 30 minutes to complete the first time as it is compiling the component interfaces, transform application and two transport libraries. Subsequent builds will use cached artifacts and be much quicker
You can close Builds that are in progress at any time and return to the Design mode, or work on another project. A notification will pop up in Tangram Pro when the Build is complete. Click Builds on the top right menu to access all previous Builds.
9. Run Containers
Downloadable artifacts are available for completed Builds if you wish to run the code locally. Since we provided Dockerfiles, let's avoid that hassle and run the code inside Tangram Pro containers!
- Select Run in the top left menu after the Build completes
- Select the completed Build and click the Run button
- Click the Run button
Tangram Pro will spin up the container images created during the build, and display each container's execution via system logs. You'll see 5 containers spin up and begin executing their commands. It may take a minute before they're all running.
- ZeroMQ starts a proxy service
- ActiveMQ starts a proxy service
- LMCP Component executes the end-to-end test app "Writer" which sends a serialized AirVehicleState message to ZeroMQ and logs the message contents
- Transform executes the transform app which listens to ZeroMQ for the AirVehicleState message, deserializes it, transforms it, serializes it in the STANAG format and sends it to ActiveMQ
- STANAG Component executes the end-to-end test app "Reader" which listens for a serialized InertialStates message from ActiveMQ and logs the received message contents
If the STANAG container logs a message, then the integration was successful!
Cheers!
Your team has successfully completed the Integration Challenge using Tangram Pro 🎉 By completing this tutorial, you've learned how to integrate two systems that use different message standards, and messaging services (or Transports.)
Check out what you accomplished:
- Designed a Multi-Transport System
- Integrated different Message Types with a Transform
- Generated compiled Interfaces, Transform Code and Transport Libraries
- Created Containers and ran an End-to-End Transform Test inside them, all within Tangram Pro!
Additional User Guide Resources:
If you want to know more about component-based system design in Tangram Pro, take a look at our blog posts.